

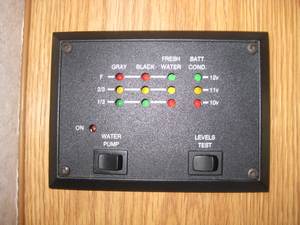
We dry camp over 90% of the time so knowing accurate information about the status of our tanks is critical to determine how many days we can continue to camp. I have 50 gallon tanks (189 litres) for Fresh, Gray and Black tanks which normally last over one week under normal use. (We carry an additional 15 gallons of drinking water in three 5 gallon containers which also doubles as our counterbalance to reduce pin weight). Every six gallons of water can add and an extra day of dry camping for us.
Over the last 10 years there have been several challenges with our tank readings. We have taken several steps to address these issues. First, our Gray tank read empty, full and 2/3rd (on a brand-new RV) and I found out that one of the sensors was wired incorrectly. Second, we could never get fifty gallons in our Fresh tank (it ranged from forty gallons to forty-six gallons) depending on our fill procedures. Filling slowly allowed us to get more in the tank as it allows the tank to expand while filling. Third, unlike most RVers who complain about their Gray tank filling faster than Black, we were just the reverse (and I know we are not any more full of s$#t than other RVers!) so something was not right.
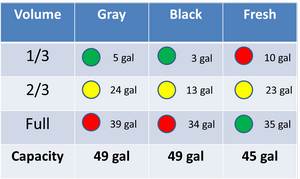
On one wet camping trip (with full hookups) we decided to measure our Black, Gray and Fresh water tanks and record when our three lights light up as we filled them a gallon at a time using a milk jug. (My wife being a retired Pharmacist made sure we measured it twice for accuracy) we were surprised at the results.
If you notice, the Black tank sensors are installed much lower on the tanks thus having all readings too low. This explained a lot of issues we had about readings. We had this chart in our RV as reference when we needed to know the status our tanks until we found a better solution.
My partner John tested an electronic tank measuring system called iSeries Tank System Monitor that gives accurate readings in % rather than just three points. He has been using this system for a while, and it works well except it does need recalibration. He decided to run new wires to compare his old system with the new system, in my case, this would be a difficult proposition as pulling new wires where I want to install the readout panel is not possible.
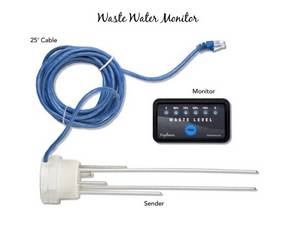
So off I went trying the find a better solution to my problem. I found a flow meter, WaterCounter, that I installed in line with my pump and that gave us a more accurate status of our Fresh water availability and solved most of our problems. What it did not address was when you fill the tank partially full to extend our stay. A more accurate reading of the status of Fresh tank would eliminate a lot of guessing and anxiety. My research uncovered several other potentials such as:
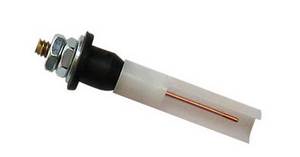
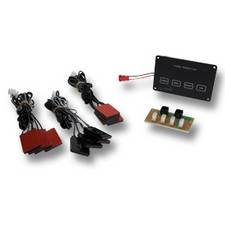
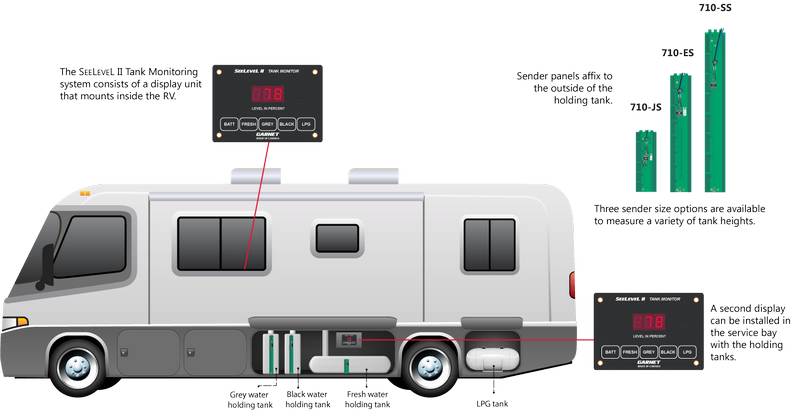
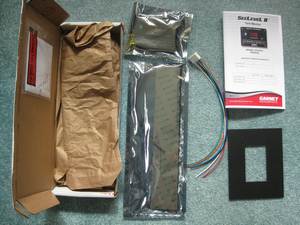
In my case the product was shipped in electrostatic bags with the following:

Since my RV is 4 seasons, the biggest workload was actually dropping and re-installing the bottom coroplast. I also decided to add a Gray tank Flush to my RV and extra insulation at the same time which added another 2.5 hours to my 4.5 hour install time. In addition, my Fresh water tank is installed over my axles which also extended my installation time. As a senior with a bad back lying on your back for this long in rainy spring weather meant you had to start and stop the project a lot, and also I had to close up each night to avoid un-invited guests (mice/rats) finding a new residence in the RV.
There is one pre-installation step of finding the size (or height of your tank) to ensure the right sensors are ordered. In my case this required me to drop my coroplast bottom (two of them) to measure. My Black and Gray tanks, located in front of the RV are 10.5 inches in height while my Fresh tank, located right on top of the axles is 7 inch in height. Therefore, I ordered the 710-ES (12 inch) sensors.
Each tank had 1 pair of wires going from the original tank sensors all the way to the monitor panel. If you have a pump switch on your monitor, you will also need to check the maximum amperage required by your pump. This is usually marked right on your water pump. In my case my pump was rated at maximum 7 amps. If your pump required more than 7.5 amps, you will also need an inline relay to accommodate the built-in switch.
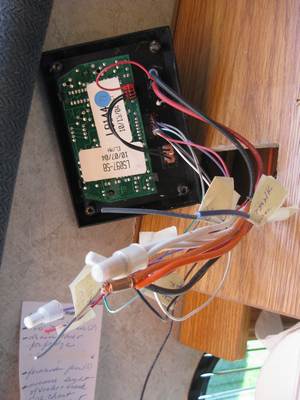
Once I received my SeeLevel II system, I opened the package and noticed that the existing wires on the sensors were not long enough for my installation, so I extended the wires. The Fresh tank required an extension of 10 feet while the Black and Gray tank sensors had a 3 feet extension.
At this time, I cut the appropriate tabs to mark each sensor for Black, Gray and Fresh tank as per instructions as well as the correct length as per instructions (leaving about a 1/4" on top and bottom to allow for the thickness of the tank). My main reason for doing this was to ensure that I keep the existing wires to my original sensors as close to original as I can. This system only requires one pair of wires to connect all the tanks to the monitor. I decided to use my original pair of Gray tank sensor wires as my common pair for the new installation.
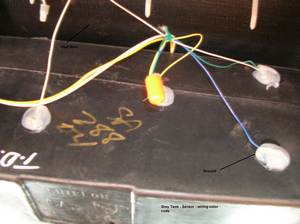
Once I identified the locations for each sensor, I thoroughly cleaned the surface using alcohol, making sure there was no metal within 2 inches of the sensor (old sensor, tank connection, frame or metal insulation if you have bubble style insulation with a metal foil on one side. Then I made sure my RV was level and then using the level I marked a vertical line on the tank. I placed electrical tape on either side of the sensor and temporarily stuck the sensor on each tank. I connected all the sensors in parallel.
Next, I removed my old monitor panel, marked all the wires (at the panel as well as on the RV, in case I have to replace it for some reason down the road). I measured the current opening in my panel and measured the opening as well as the depth to ensure the new panel would fit. I had to square up the hole using a coarse wood file. Next, I looked at my pump switch and how it turned on (is up on or is down on). SeeLevel II system has the ability to address both conditions (small feature that comes in handy).
My RV does not have a propane sensor (like RVs with fixed tanks) so I taped up these wires. This unit also has the capability to install a tank alarm to warn against any critical conditions that you program into the unit. Since I am not a fan of buzzers going on in the RV (and worse staying on till the alarm condition is resolved), I decided that I would install a small LED light at a later date to warn us quietly.
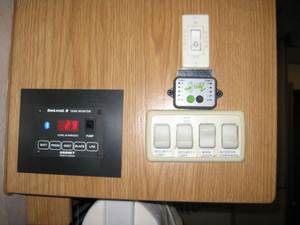
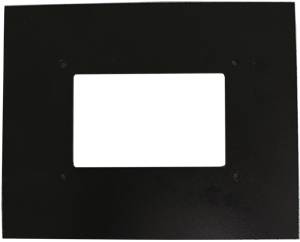
Following the wiring instructions provided, I connected the panel to the wiring harness provided. Then I slipped the filler panel on before I connected the wiring harness to the monitor and pushed all the wires in. Using the level to level the monitor/filler panel I screwed them into the RV. Now that I had the panel powered up, I checked the reading on each of my tanks. One of the Fresh tank wires had come off while I was working on the panel and the monitor quickly identified it as an open circuit (another nice feature) which I resolved.
Since my Gray and Black tanks had some fluids in from de-winterizing the RV, it seemed like a reasonable reading. I emptied all tanks and the reading went down to zero like they should. I then filled the tanks and the reading showed 100% which completed my test to ensure the sensors were at the right place. I went back to the sensors, removed the electrical tape and the 3M paper on the sensors and stuck the sensors vertically along the line. Be careful as you only get one chance to stick it right.
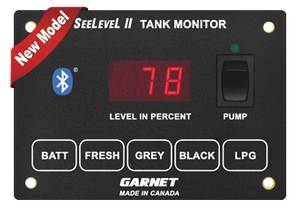
I then went on my android phone and installed the Garnet app from the Google Play Store and setup Bluetooth to connect to the monitor and the display showed me my tank readings as well as my battery voltage (really cool stuff).
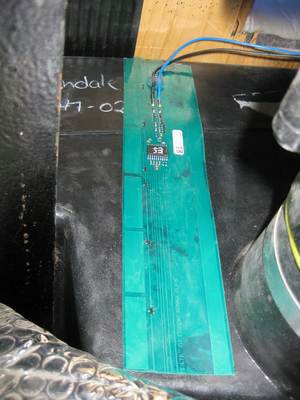
Now all that remained was to re-install my coroplast bottoms and all the insulation. Since I also installed a Gray tank flush too, I had to do some Pex pipe routing and valve installation. This was a very straight forward retro-fit. The opening and closing of the closed bottom takes more time than installing and testing the SeeLevel II system. If your tanks are exposed (two or three seasons RV) the installation time would be a lot less. The one install that could prove to be difficult is if you have the tanks with hard foam insulation as it would take time to remove the foam, clean up the location before installing the system. Some Class A and Class C RVs may have their tanks exposed in the storage bins so installation would be fairly easy.
The instructions provided are very good and thorough. The built-in fault conditions are clearly messaged and cover most error conditions during install and deployment. The factory support is also excellent as you speak with knowledgeable staff.
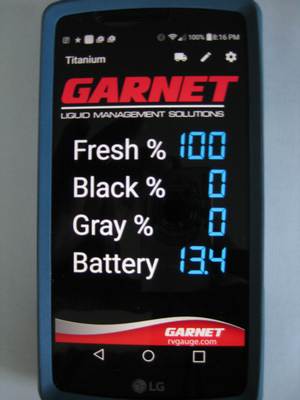
I have been putting the system through its paces while de-winterizing and sanitizing my water systems prepping for our two-week RV trip. I observed the following:
Net, net, I am very happy with the system. It provides me with a level of information we need to take our lifestyle on the road and reduces any anxiety related to our tanks and water management when dry camping. Well worth the effort required to install the system, no more guessing!
To view some YouTube videos on the products and installation, check these out:
Garnet Instruments Ltd.
286 Kaska Road
Sherwood Park, Alberta
T8A 4G7
P 800.617.7384
website: https://www.garnetinstruments.com/rv-shop/
Garnet Technology Inc.
201 M & M Ranch Road
Granbury, Texas
76049
P 877.668.7813

National Day Calendar
✔ Mark your calendar,
June 7 is
National RV Day,
Let's go RVing!
The type of recreational vehicle dump stations you will find on Sanidumps.com include: private, public, RV park, non-park, municipal, truck stop, rest stop, campground, camping, resort, commercial, pay, donation, waste disposal, and free.
It is important to dispose of human waste properly when RVing. The RV dump station, dump point, or sanidump station you choose to empty your gray and black water holding tanks is up to you; we're hoping that you will choose an approved dump station site that's green and environmentally friendly, using an environmentally sound method.
Do you need to know where to dump your holding tanks when your RV is on the road? Now you can know where the RV dump Stations are while traveling with a e-book. More information about the RV Dump Station location e-book.
Although efforts are made to make sure of the accuracy of the information presented, Sanidumps.com shall have neither liability nor responsibility to any person or entity with respect to any loss or damage caused, or alleged to be caused, directly or indirectly by the information contained here.
Sanidumps.com is not affiliated in any way with any place/location listed on this site. Fees are subject to change; availability and prices can and do change.
We thank all the RVers that have contributed information :-)
The Sanidumps.com Team
Serving the RV community for over 18 years
Sanidumps.com - When RVs have to go...™
© 2006 - 2024 Sanidumps.com - All rights reserved.
The content contained on this website may be used for personal reference only and may not be reproduced in any form without prior written consent permission from Sanidumps.com
Australia, Canada, Mexico, New Zealand, United States & more...