

Animals do it, humans do it, but we couldn't, it's a thing called migration - the traveling of long distances in search of a new habitat.
This can be either the moving from a cold region to a warmer region (RVers are often called Snowbirds when they do it during winter) or moving from a hot climate to a cooler one for the summer.
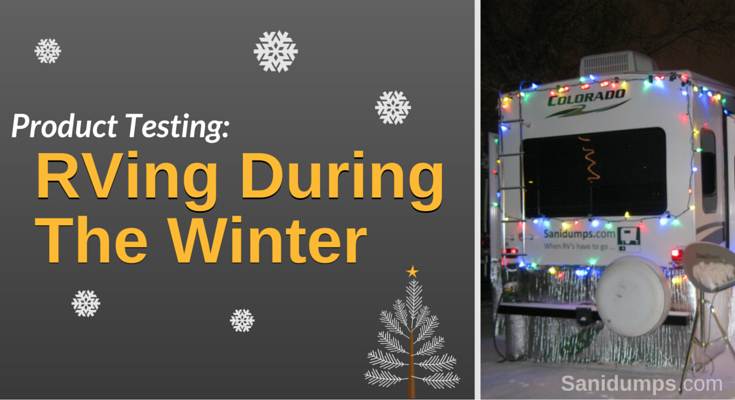
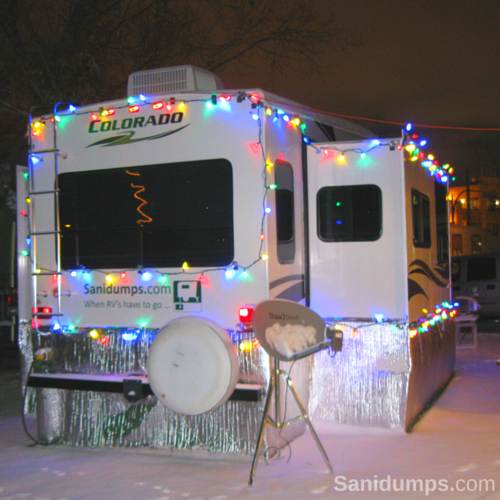
We (John and his wife Chris) decided to stay in their RV for the winter while our home was getting ready for us so this report is not about going South for the winter, we are living in our RV where we will have temperatures well below freezing for weeks at a time. The coldest recorded temperature in the city was -36.1°C (-33.0°F) recorded on December 30, 1968.
Our recreation vehicle is a fifth wheel RV with the following features:
In preparation for this adventure there are five areas that must be considered for human comfort:
With Power Management I will be discussing how we manage our 30 amps of electrical power and propane use.
In simple terms you can consider the 30 amps of available power as two household circuits or approximately 1650 to 1800 watts of power for each circuit.
You should plan on using (120V * 15A) * 80% = 1440 watts per circuit. 80% is a safety margin, so the circuit is not at 100% load. 83% would be 1500 watts and many appliances use 1500 watts, so I planned on using an 83% load rating.
So continuing with the idea of two circuits I planned my power use as:
With this circuit we had to ensure that only one device is used at one time as each device draws approximately the full amount of power available to this circuit.
Remember that we can only use one (1) of the above devices at one time.
With this circuit we planned to have any number of the devices running at the same time.
Our RV has two 30 lb (6.8 gallons) propane tanks with an automatic propane regulator that switches from the first tank to the second tank when the first tank becomes empty. I also borrowed a third 30 lb (6.8 gallons) tank from a friend.
One of the fellow RVers in the campground had a connection to get propane at a lower priced than the local gas station, so we used him for getting our propane supply.
So how long will your propane tank last?
This depends on many factors but there is a simple way to get a rough calculation. The following chart will show the approximate number of hours a propane tank will last while running a furnace at 100%.
| Tank Size (lbs) | Tank Size (gallons) | 25,000 BTU furnace | 30,000 BTU furnace | 35,000 BTU furnace | 40,000 BTU furnace |
| 20 | 4.6 | 17.2 | 14.3 | 12.3 | 10.8 |
| 30 | 6.8 | 26.0 | 21.7 | 18.6 hours | 16.2 |
| 40 | 9.2 | 34.4 | 28.7 | 24.6 | 21.5 |
| 100 | 22.9 | 86.4 | 72.0 | 61.7 | 54.0 |
| 200 | 45.6 | 172.8 | 144.0 | 123.5 | 108.0 |
For example, with a 30 lb (6.8 gallons) propane tank and if it took three days to empty and a tank lasting approximately 18.6 hours shows that the furnace was running approximately six hours a day. In reality, we also used the stove top for cooking (not heating, 9100/6500 BTU) and the hot water heater (34,000 BTU) so the furnace was not running six hours a day. This demonstrates how often someone must be prepared to refill the propane tanks when RVing during sub freezing temperatures.
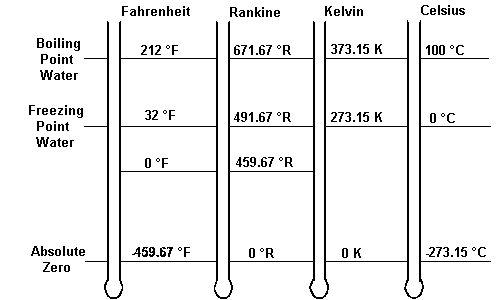
With heat management I will be discussing the different things I did for managing heat or preventing the lost of heat in the RV. A temperature conversion chart is at the end of this report.
During September and most part of October and November we only used one 1500 watt electric heater to heat the RV.
We added vent cushions to each of the roof vents. This reduced the heat lost through the vents but caused another problem. With the vents closed and the vent cushions in placed we found that moisture would condense on the top side of the cushion, over time this would become mold, so we opened the vent a tiny bit to let the moisture out.
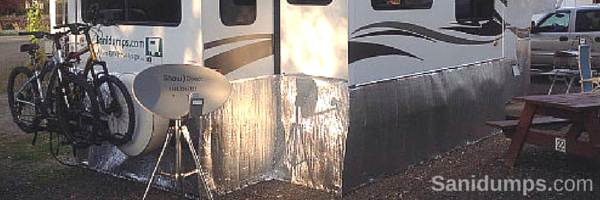
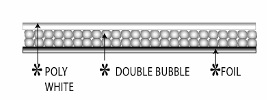
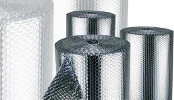
We skirted the RV with foil-faced bubble wrap. This served two purposes; reducing heat lost through the belly of the RV caused by blowing wind, contain the heat from the heater under the RV under the RV, this kept the floor of the RV warmer and was recommended by several RVers in the campground.
Heat moves by 3 methods, convection (mass air transport), conduction, and radiation. Insulation (or R value) resists heat by conduction.
The heat source for the inside of the RV was mainly provided by one ceramic heater (1500 watts) running on the high setting. When the ceramic heater couldn't provide enough heat we supplement heat with the RVs built in propane heater.
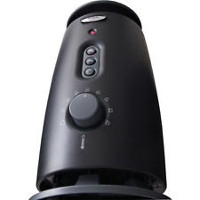
We also ran a ceramic heater (800 watts) under the RV in the skirted area, this provided heat to the basement area of the RV and added some heat to the belly of the RV to help prevent any water lines from freezing.
We did not use the RV stove or oven as a heat source, as both of these appliances use oxygen from the living area. When either of the stove or the oven was used for cooking, we always opened a kitchen window to allow fresh air (oxygen) into the RV. Lack of oxygen can cause cerebral hypoxia.
Moisture Control is important in an RV any time of the year, but it becomes very important when you will be in a climate (enclosed RV with moisture from boiling kettle, cooking, showers, etc.) that will produce mold! Mold growth in buildings can lead to a variety of health problems.
To manage the moisture you are basically managing the humidity in the RV. When RVing in warmer climates you can manage the humidity by simply running a bathroom exhaust fan to remove the moisture from the air. When you are in a cold climate, you want to remove the moisture from the air and reduce the heat lost.
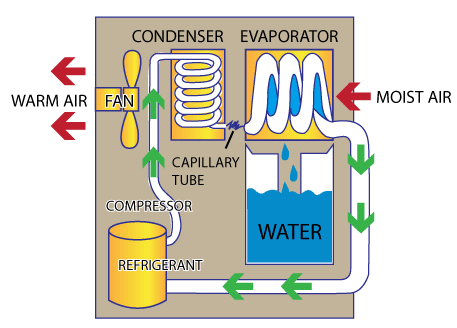
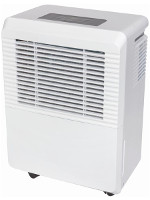
We managed the humidity and heat lost in the RV with an household dehumidifier. Some days the dehumidifier removed over ten cups of water in and 24-hour period! We played a guessing game trying to guess the amount of water the dehumidifier removed each day.
Even with the dehumidifier running there were areas in the RV that we still had moisture problems. The head of the bed (in a slide out) near the bottom had very little insulation so when the temperature went below freezing we found condensation on the inside of the RV in this area. We fixed this issue with adding a piece of 1 1/2" rigid foam board insulation across the head of the bed for the full width of the slide (10" in height to match our mattress height). The sides of the slide didn't have space for adding 1 1/2" foam board to each side, so I used 3/4" foam board instead.

The dehumidifier had an automatic humidity range of 35% to 75%, when the temperature got cold outside (-10°C / 14°F) it would have been nice if the dehumidifier could have gone to a lower setting such as 20% or 25%. Running the dehumidifier on a continuous setting, the unit lowered the humidity down to 30%.
Other RVers in the campground had similar issues with moisture and one RVer mention that the previous year they lost pillows stuffed in their closet from mold.
We also kept our sliding closet door open to permit air to flow through the closet, I have found that most RVs do not have their closet well insulated.
We placed a second ceramic heater under the RV on a low setting, this kept the underside of the RV and the RV basement warm. The heater also prevented the water lines from getting too cold and freezing.

Many RVers use a water hose fifteen to twenty-five feet long during the warm season but during freezing temperatures you will have to keep the hose from freezing so a shorter hose length would be better.
The use of heat tape on the water hose is very common when RVers are camping with temperatures below freezing. The key item you will have to be aware of is that the whole hose needs heat tape, this can become expensive with longer hoses.
I removed my water hose and replaced it with 3/4" household water pipe with standard hose connections on each end. This reduced the amount of hose I needed to put heat tape on from twenty-five to eight feet. I also removed our external water filter as this would normally freeze and could not be protected with heat tape. When selecting a heat tape to purchase, read the package to ensure that it is appropriate for your application and is of required length. Most heat tapes are ok for use on plastic or metal water lines. Install the heat tape to the manufacturer's specifications and make sure that you do not cross the streams or wires.
For the eight feet of water pipe I purchased a heat tape package measuring twelve feet per the manufacture recommendations. Remember, not only are you wrapping around the water pipe but also the water tap.
I then covered the pipe and heat tape with foam pipe insulation and then wrapped the insulation with the foil-faced bubble wrap.
The area around the water tap I covered with pink insulation, a layer of the bubble wrap then with silver tape to waterproof the pink insulation.
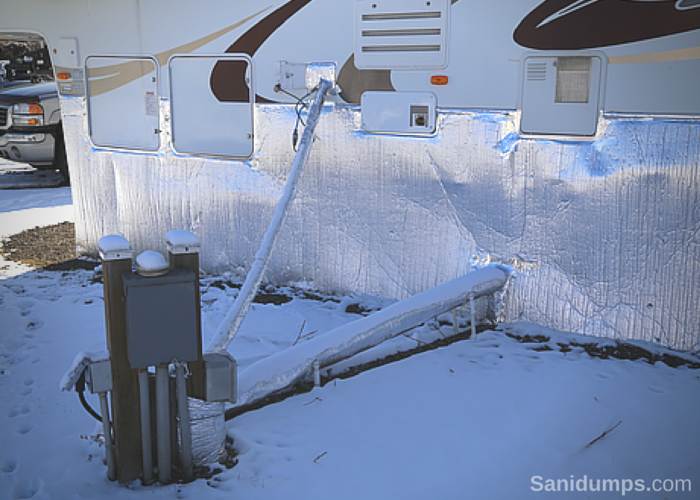
The campground manager advised us that if our water tap froze then the campers next to us would not have any water, due to the method the water lines were placed in the campground. Our water supply didn't freeze during the winter.
Our RV has three holding tanks; Black tank, Grey tank and a Galley tank.
There's lots of discussions about having your holding tank valves left open or closed. We recommend keeping your holding tank valves closed during warmer climates while several RVers in the campground recommend to keep them open as the access to the valves is difficult when you skirt the RV.
I decided to try a combination of the above this winter. The Grey and Galley tank valves will be left open while the Black tank valve will be left closed (both grey and galley tanks will get thorough cleaning in the spring). I have a door in the RV skirt to access the Black holding tank valve and I figure I will only have to dump the tank once every week or two.
When I dump the Black holding tank I will also flush all holding tanks with the flush kit that is installed on the RV.
In November we started to monitor our propane use and documented when we saw a propane tank transfer on the propane regulator. This is when one tank (30 lb / 6.8 gallons) is empty, and we started to use the second propane tank on the RV. The change over dates are:
Mid March we moved to our home which was ready for us.
Approximately twenty 30 lb / 6.8 gallon propane bottles were used for the winter stay. The price range for refilling the propane was $25 to $30 per bottle. If you made a rough calculation of 20 (bottles) x $30 (fill) / 3 (months, Dec., Jan., Feb.) = $200 per month for propane. Note, the calculations have been made on the high side and if I include the monthly rental for the campground, the cost of preparing the RV for the winter stay, we could not find a one-bedroom rental unit anywhere near the cost of staying in the RV for winter.
The coldest temperatures we recorded at the RV campsite during the 2013-2014 winter months were:
To find out the conversion between Celsius to Fahrenheit temperatures. Use these equations to figure the conversion out.
Converting Fahrenheit to Celsius: ((°F -32) x (5/9)) = °C
Converting Celsius to Fahrenheit: (°C x (9/5)) +32 = °F
| Celsius °C | Fahrenheit °F |
| -30°C | -22°F |
| -25°C | -13°F |
| -20°C | -4°F |
| -15°C | 5°F |
| -10°C | 14°F |
| -5°C | 23°F |
| 0°C | 32°F |
| 5°C | 41°F |
| 10°C | 50°F |
| 15°C | 59°F |
| 20°C | 68°F |
| 25°C | 77°F |
| 30°C | 86°F |
| 35°C | 95°F |
I asked Chris about staying in the RV with the cold outdoor temperatures, would we do this again?
She said Yes!
On the same subject, our guests who are also RVers were very surprised with the warmth and comfort in the RV during their stay.
Would I do it again, Yes!
With some planning, your RV can be prepared for winter camping with comfort.
Happy RVing,
John

National Day Calendar
✔ Mark your calendar,
June 7 is
National RV Day,
Let's go RVing!
The type of recreational vehicle dump stations you will find on Sanidumps.com include: private, public, RV park, non-park, municipal, truck stop, rest stop, campground, camping, resort, commercial, pay, donation, waste disposal, and free.
It is important to dispose of human waste properly when RVing. The RV dump station, dump point, or sanidump station you choose to empty your gray and black water holding tanks is up to you; we're hoping that you will choose an approved dump station site that's green and environmentally friendly, using an environmentally sound method.
Do you need to know where to dump your holding tanks when your RV is on the road? Now you can know where the RV dump Stations are while traveling with a e-book. More information about the RV Dump Station location e-book.
Although efforts are made to make sure of the accuracy of the information presented, Sanidumps.com shall have neither liability nor responsibility to any person or entity with respect to any loss or damage caused, or alleged to be caused, directly or indirectly by the information contained here.
Sanidumps.com is not affiliated in any way with any place/location listed on this site. Fees are subject to change; availability and prices can and do change.
We thank all the RVers that have contributed information :-)
The Sanidumps.com Team
Serving the RV community for over 18 years
Sanidumps.com - When RVs have to go...™
© 2006 - 2024 Sanidumps.com - All rights reserved.
The content contained on this website may be used for personal reference only and may not be reproduced in any form without prior written consent permission from Sanidumps.com
Australia, Canada, Mexico, New Zealand, United States & more...